How to build your own water pump using everyday materials
12/10/2018 / By Mary Miller
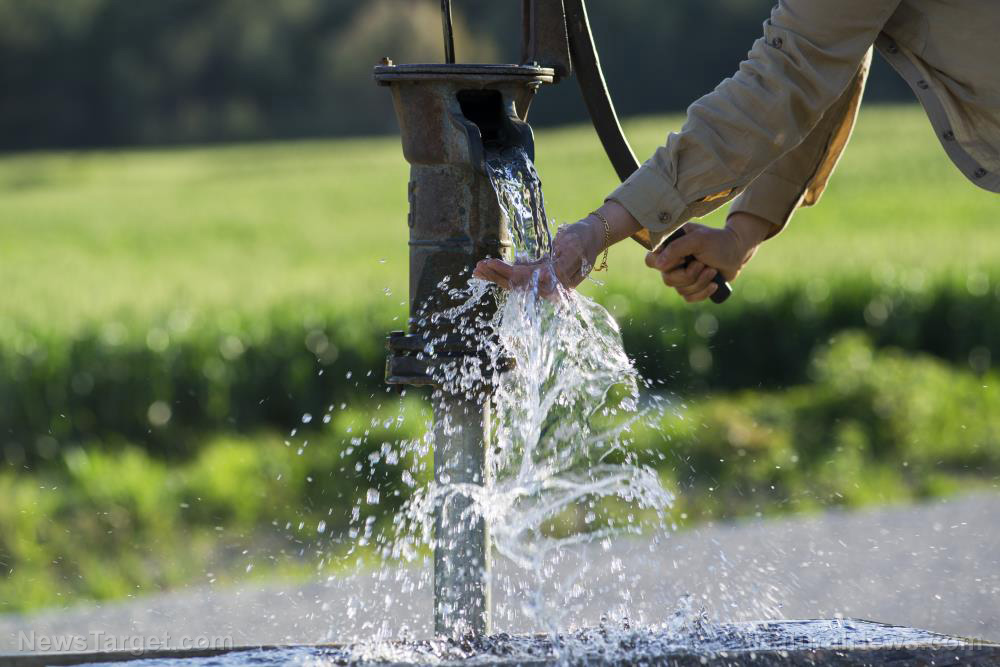
Water is essential to survival, so having your own water pump can be incredibly useful. In times of drought or water shortages, it will be easier for you to obtain water and take control of your water supply. Be resourceful and make your DIY water pump using items you can find at your local hardware store. (h/t to Survivopedia.com.)
How to build a PVC hand pump
This manual hand pump is best suited for wells that have water within 25 feet of the ground’s surface. The key to making a PVC hand pump work is the check valve. One-way check valves are used to let water or air go in one direction, while also blocking it from going the other way. You will also need a plunger piston. This will require a large tube and a smaller sealed tube inside it. The inner pipe should be connected to whatever is powering your pump. Since this a manual pump, you’ll want to have a “T”-shaped handle to maximize the effort you put into pumping water, like with a manual bicycle pump. (Related: Amazing device pumps well water using compressed air (video).)
Items needed:
- 1″ PVC pipe (26″ inch long)
- 2 x 1″ slip caps
- 1″ slip tee
- 1-¼” slip cap
- #320 rubber O-ring
- 2 x #219 rubber O-rings
- 1-¼” PVC pipe (24″ long)
- 1″ plug
- 1-¼ in. by ¾ in. PVC bushing
- ¾” PVC close riser
- ¾ in. PVC FIPT x FIPT x FIPT tee
- 1-¼” slip coupling
- 2 check valves
- table saw
- PVC cement
- sandpaper
- PVC cement
- lubricating jelly
- drill with 1-3/8″ Forstner drill bit
- thread tape
Sponsored solution from the Health Ranger Store: Lab-verified Nascent Iodine solution is a dietary supplement that provides your body with supplemental iodine to help protect your thyroid during radiation exposure. Nuclear accidents such as Fukushima (or nuclear war) can expose your body to radioactive iodine-131, a dangerous radioisotope. Pre-loading your system with stable iodine occupies the iodine receptor sites on your organs, causing your body to naturally expel radioactive iodine you may have been exposed to through air, food, water or milk products. This defensive strategy is recommended by nearly all health authorities, worldwide, including the Nuclear Regulatory Commission. Discover more at this link.
Procedure:
- To make the plunger piston, begin by fastening the 1″ PVC pipe over the blade of a table saw.
- Measure out two marks from the end of the pipe; one at one inch from the end and another at two inches from the end.
- Adjust the blade of the table saw so that it doesn’t cut any deeper than halfway through the tube.
- Use the table saw to cut through the pipe at the one-inch mark. Hold the pipe in place with one hand and use the other hand to rotate the tube carefully. This should result in a little groove all the way around the pipe.
- Repeat the process to cut through the pipe at the two-inch mark. You should have a second clean and uniform groove.
- Place a rubber #219 O-ring on each of the two grooves. They should fit snugly and should just be slightly higher than the surface of the rest of the tube. This will allow you to push and pull the water easily, but also keep it from squeezing out of your pipes.
- Seal the tube with PVC cement and place the 1″ plug on the end. Wipe away any excess glue.
- Use sandpaper to smooth the sides of the pipe.
- Cut off two 4½” pieces from the top of the pipe to create the handles.
- Use some PVC cement to glue the 1-¼” slip coupling to the 1-¼ in. by ¾ in. PVC bushing.
- Take the 1-¼” PVC pipe and use PVC cement to glue that into the slip coupling.
- Glue the two 4½” pieces of pipe to each opposite end of the 1″ slip tee. The idea is to form a “T”-shaped handle.
- Take the two 1″ slip caps and glue those to the ends of the two pipes to complete your handle.
- Apply lubricating jelly to the O-rings of your plunger piston and insert it into the larger PVC pipe.
- Take the 1-¼” slip cap and drill a hole in it so that the piston can fit inside it.
- Firmly place the #320 rubber O-ring inside the slip cap. Apply more lubricating jelly inside the slip cap if necessary.
- Glue the slip cap to the top of the larger PVC pipe. The piston should stick out of the slip cap by just a couple of inches.
- Attach the handle to the piston and glue it in place to complete your hydraulic piston.
- Connect the ¾” PVC close riser to the PVC bushing and screw it into place.
- Connect the ¾ in. PVC FIPT x FIPT x FIPT tee to the close riser and screw that into place too. Use thread tape to keep the connections water tight if you need to.
- Connect the two check valves to the bottom of the tee, and you should have a completely operational water pump.
Learn more ways to take control of your own water supply by visiting WaterWars.news.
Sources include:
Tagged Under: bug out, DIY, Drought, emergencies, homesteading, how-to, off grid, preparedness, prepper, prepping, self sufficiency, survival, survivalist, water pump, water shortages, water supply